This guide covers taking a booking from the staff side — at the POS, over the phone, or as a manual entry. For self-service bookings through your website, see Installing the Booking Widget.
1. Open the calendar
Go to Calendar from the main menu. You'll see a grid of rooms down one axis and time across the other. Green slots are available, grey are unavailable (no slot configured), and coloured slots are existing bookings.
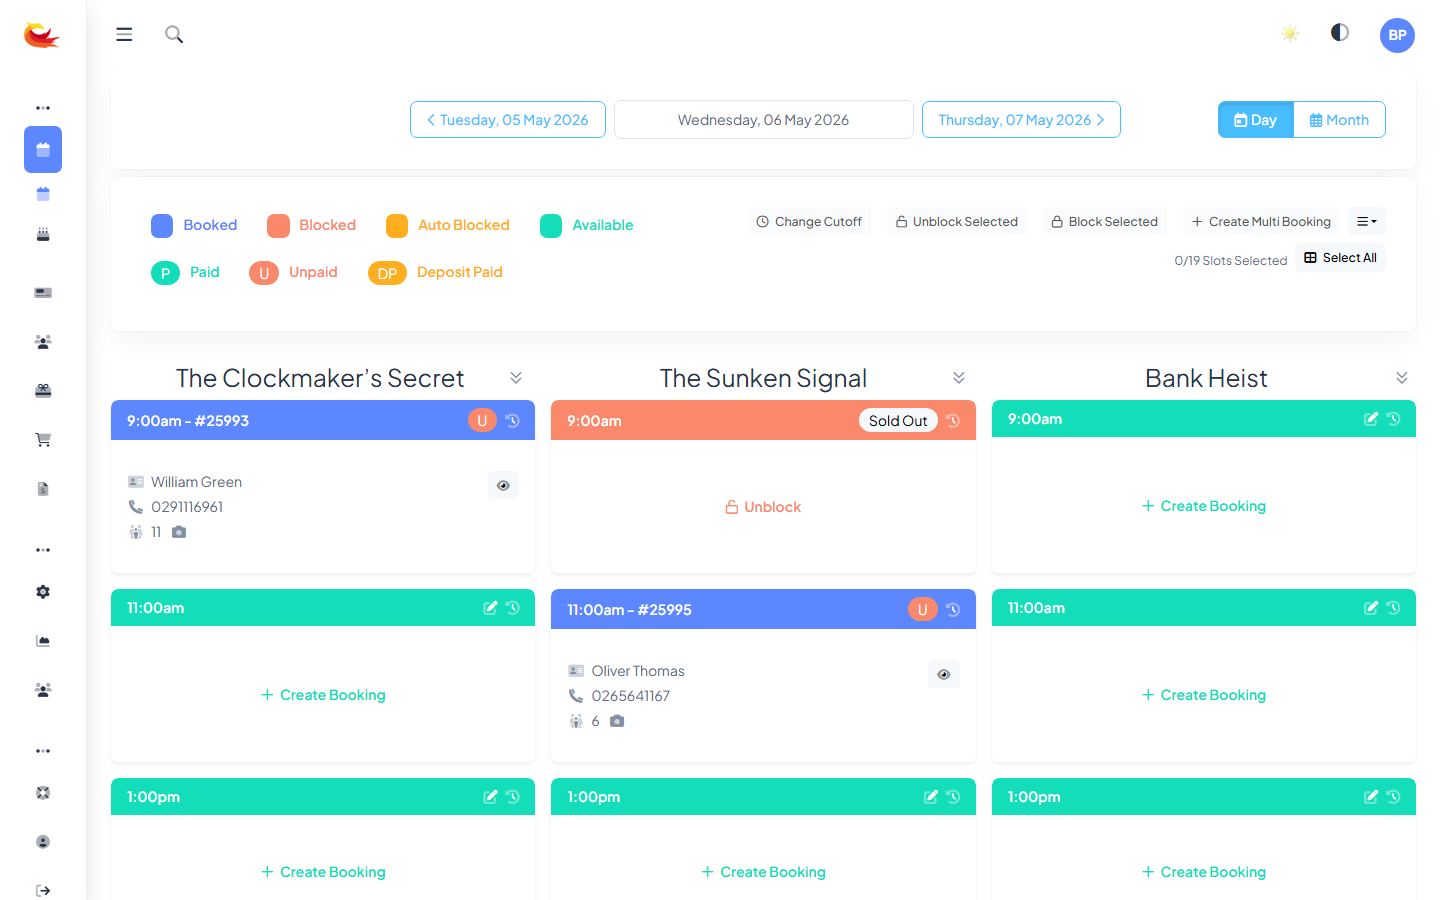
2. Click the slot you want
Click an available slot. A booking form opens with the room, date, and time already filled in.
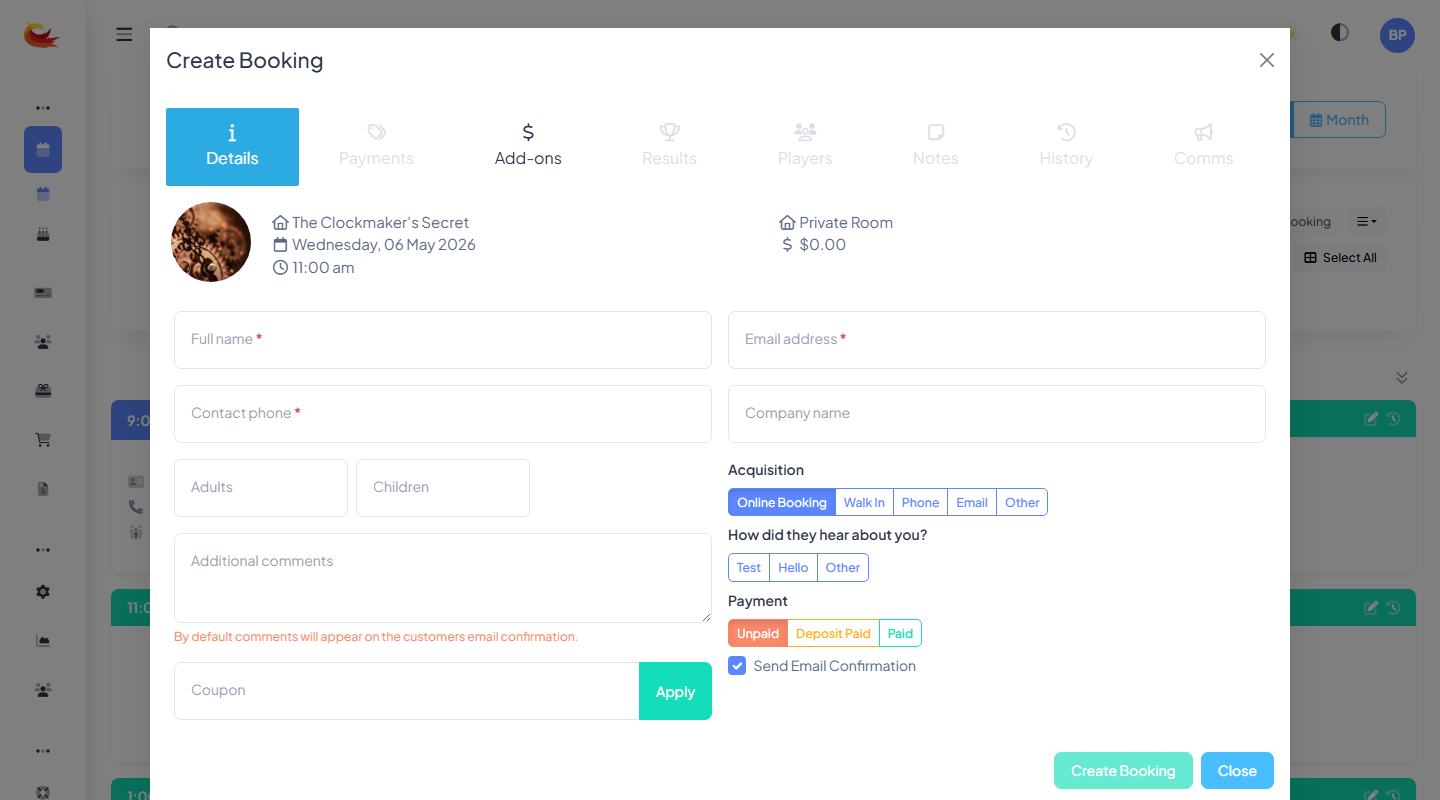
3. Enter customer details
Start typing the customer's name, email, or phone number in the customer field. If they've booked before, their record will appear in the dropdown — click to select and the rest of the form autofills. For new customers, keep typing and fill in name, email, and phone on the blank form.
4. Set player counts
Enter how many of each player type are attending. If your branch differentiates Adult/Child/Senior (etc.), fill in each category separately; the price updates live based on your pricing groups and breakpoints.
5. Apply any extras
- Coupon code — if the customer has one, enter it to apply the discount.
- Voucher redemption — for gift vouchers, enter the voucher code and the amount will be deducted from the total.
- Upgrades and add-ons — any configured upgrades for the room appear as checkboxes.
- Internal note — anything staff need to know (accessibility needs, dietary info, special occasions).

6. Take payment
Choose a payment method from the payment panel:
- Card (Stripe) — enter card details or tap a saved card on file. Charges immediately.
- Cash / EFTPOS / other — record the payment without charging anything; use this when you've already taken money another way.
- Pay later / unpaid — creates the booking with a balance due. Useful for phone bookings where the customer will pay on arrival.
7. Save the booking
Click Save Booking. The system:
- Creates the booking and deducts availability from the slot.
- Sends a confirmation email to the customer (if an email address was provided).
- Logs the payment if one was taken.
- Closes the modal and updates the calendar so the slot shows as booked.
Booking over the phone
Same flow. Quote availability by reading from the calendar, enter their details as they give them to you, and either take the card over the phone (using the Stripe panel) or tick Pay later and ask them to pay on arrival. Always read the booking reference and total back to them before hanging up.
Booking a group larger than max players
If a customer wants to book more players than the room's max, check whether the slot's availability allows parallel bookings. If so, book them into two adjacent slots. Otherwise, steer them to a function room or a larger space.
What if the slot fills while you're on the phone?
The system re-checks availability at save time. If someone else books the same slot before you click Save, you'll see an error — just pick another slot and re-enter the customer's details. Refreshing the calendar will show the latest state.
Was this article helpful?
That’s Great!
Thank you for your feedback
Sorry! We couldn't be helpful
Thank you for your feedback
Feedback sent
We appreciate your effort and will try to fix the article